In this blog post, we will discuss the benefits of using a Wacom tablet for teaching. I am sure you are aware that tablets have become an essential part of modern classrooms.
They help students learn better and more than they would with paper and pencil alone. But, many teachers don’t know how to use them in their classes.
We’ll explore why they are useful for teachers and three simple ways you can get started today!
1. Use a Wacom tablet connected to a projector
For the students to see what you are doing, you need to project your drawings onto a screen.
Connecting the Wacom tablet to your computer and projector will allow the class to see. They can take part in lessons instead of only listening or watching.
You could use an interactive whiteboard. It is a larger screen that can also act as an input, allow you to write with the pen on it, and more.
The possibilities are endless when using a Wacom tablet to teach. Find what works best for you and your class.
2. Use Microsoft OneNote
Microsoft OneNote is an excellent way to present your lesson notes. You can save the lesson images and notes in a digital format, which you can access online.
OneNote has come a long way. It’s now possible to insert pictures, videos and audio into your digital notebooks. You can create mind maps and sketches. Drawing out examples to help students to understand difficult concepts.
OneNote also comes with a “drawing” canvas mode. This mode allows for freehand drawing with a variety of pens and tools.
At the end of the lesson, you can export the OneNote notebooks with all the drawings and content to a PDF file. Or, you can share your OneNote notebooks with students so that they’re able to work on lessons at home.
Microsoft OneNote is an ideal companion for a teacher and their Wacom tablet.
3. Turn off pressure sensitivity or artistic options
If you are not teaching art , then you may want to turn off any pressure sensitivity options. This will allow you to use the pen more like a mouse and make it easier to get your desired cursor position and lines.
You can do this in the Wacom’s settings menu. Choose Stylus, which you can find within Settings > Devices > Tablet Properties.
Your drawings and notes will be in a thicker line, making it easier to read – even for those naughty kids in the back row.
How to use a Wacom tablet for teaching
When I was in school the teacher used an OHP overhead projector. They had lesson notes drawn by hand onto acetates which they projected onto the wall. The students would take their own notes on those pages and then hand them back to the teacher.
And when the teacher didn’t want us to see a part of the acetate, they covered it with another piece of paper.
With a Wacom tablet, you can share your computer screen and then draw and write on top of your lesson notes. Different parts of the lesson can be hidden on different pages.
You can also draw diagrams and pictures for your students to see, or use them as a whiteboard. Using a Wacom tablet is much more effective and engaging than using paper and pencil alone.
Let’s look at 3 ways to get the best out of this amazing teaching tool.
What are the benefits of a teacher using a Wacom tablet in the classroom?
There are many potential benefits to using a Wacom tablet in the classroom.
- The best thing about teaching with your Wacom is that you can share what you are doing on screen. This will help you explain techniques or problem solving. It helps remove any doubt or confusion for students.
- You can export your lessons and notes for your students.
- The Wacom tablet allows teachers an easy way of flipping between documents. Even when using different teaching apps or websites.
- It is easy to show a concept and then delete it.
- If you are working online with Zoom, it is easy for you to share your screen with students so they can join in. They can see the notes you are making, or what you are emphasising.
- The Wacom tablet lets teachers capture screenshots or take notes for lesson research.
- The graphics tablet is small and light enough to pop in your bag and take with you at the end of the school day. So you can use it when you are doing marking at home 🙁
Are there any drawbacks of using a Wacom tablet in the classroom?
Unfortunately, there are some cons to using a Wacom tablet in the classroom:
- Some teachers find that they forget their pen and need to keep going back to their desk for it. This can be frustrating in big classes with many students needing your attention.
- Make sure you get a tablet that uses a battery-free pen (passive). Otherwise you will forever be worrying about the charge running out mid-lesson.
- You will need more desk space than normal. Graphics tablets may not be compatible with smaller classroom setups.
- You may find that you need to buy a variety of apps; some designed for teaching and some not to get the best out of the Wacom.
It’s clear that technology can be a powerful tool for teaching.
With these simple tips, you might find yourself more comfortable using your Wacom tablet in the classroom or elsewhere and get better results. I hope this helps!
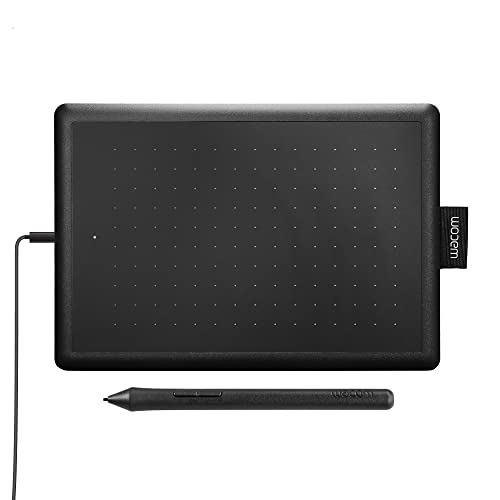
If you don’t have a graphics tablet yet, we recommend the Wacom One. It is small but capable and compatible with most computers you will find in schools, including Chromebooks.
- One by Wacom, Portable, Versatile Drawing Tablet:...
- Compatible With All Software Technology: This...
- What the Professionals Use: Wacom's industry...
- Software and Training Bundle: This portable...
Please share with us how it goes if you try any of these suggestions out by commenting below.
Thanks so much for reading–we’re always looking to hear from our readers about what they need!